Life-Saver Tips: How to Repair a Tire Safely and Quickly
A flat tire never waits for a convenient moment.
It can happen on a highway, during a family trip, or late at night with no help nearby.
Yes, most vehicles come with a spare tire.
But spare tires are temporary solutions.
Knowing how to repair a tire properly can save time, money, and unnecessary towing.
As a mechanic, I’ve seen thousands of tires replaced when they didn’t need to be.
With the right tools and the right steps, many punctures can be safely repaired on the road.
This guide explains:
-
When a tire is repairable
-
Tools you must carry
-
Step-by-step tire repair methods
-
Safety limits every driver must know

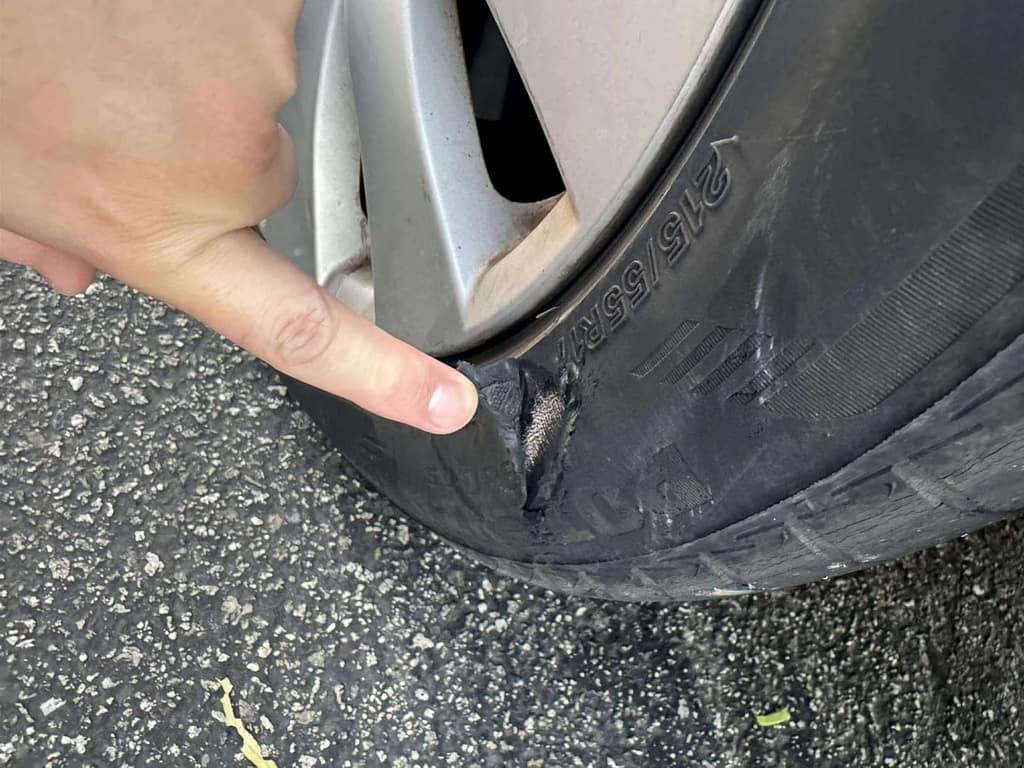
When Is a Tire Repairable?
Not all tire damage can or should be repaired.
Repairable vs Non-Repairable Areas
| Tire Area | Repairable? | Reason |
|---|---|---|
| Center tread area | ✅ Yes | Structural integrity remains |
| Shoulder area | ❌ No | Flex stress causes failure |
| Sidewall | ❌ Never | Risk of blowout |
| Large gashes | ❌ No | Weakens tire casing |
| Multiple close punctures | ❌ No | Unsafe repair zone |
Size Matters
-
Puncture must be less than ¼ inch (6 mm)
-
No overlapping damage
-
No exposed cords or steel belts
If you see bulges, cracks, or fabric threads, replace the tire immediately.
Tools You Need to Repair a Tire
Always keep these in your vehicle.
Essential Tire Repair Kit
| Tool | Purpose |
|---|---|
| Tire plug kit | Seals punctures |
| Air inflator / compressor | Refills tire |
| Jack & jack stand | Lifts vehicle |
| Lug wrench | Removes wheel |
| Pliers | Pulls out nails or screws |
| Tire cutter / knife | Trims excess plug |
| Chalk or marker | Marks puncture |
| Tire sealant (optional) | Temporary repair |
Pro Tip:
Check your kit every 6 months.
Dry plugs or empty sealant cans are useless.

How to Repair a Tire: Step-by-Step
Step 1: Inflate the Tire and Find the Leak
If the tire is flat:
-
Inflate it slightly
-
Listen for hissing air
-
Look for nails or screws
Use soapy water if needed.
Bubbles reveal leaks instantly.
Important:
If a screw is embedded, do not remove it until you’re ready to plug the hole.
Step 2: Decide Between Plug or Sealant
| Method | Best Use | Limitations |
|---|---|---|
| Tire plug | Long-term emergency fix | Requires tools |
| Tire sealant | Fast roadside solution | Speed & distance limits |
Sealants are temporary.
Plugs last longer but still require replacement later.
Step 3: Jack Up the Vehicle Safely
-
Park on level ground
-
Engage parking brake
-
Place wheel chocks
Loosen lug nuts slightly before lifting.
Lift vehicle using manufacturer-approved jack points.
Step 4: Remove the Wheel
-
Fully remove lug nuts
-
Pull wheel straight off
-
Lay it flat on the ground
Never work under a vehicle supported only by a jack.
Step 5: Remove the Object and Clean the Hole
-
Use pliers to remove nail or screw
-
Mark hole location
-
Insert rasp tool from plug kit
-
Push and pull several times
This roughens the hole for proper sealing.
Step 6: Insert the Tire Plug
-
Thread plug through insertion tool
-
Coat plug with rubber cement
-
Add cement into hole
Push plug halfway into the tire.
Pull tool straight out.
Let adhesive set for a few minutes.
Step 7: Trim Excess Plug and Re-inflate
-
Cut excess plug flush with tread
-
Inflate tire to recommended PSI
-
Spray water to check for leaks
No bubbles means a successful seal.
Step 8: Reinstall Wheel and Tighten Lug Nuts
-
Mount wheel back on hub
-
Hand-tighten lug nuts
-
Lower vehicle partially
-
Tighten in star pattern
Lower completely and torque firmly.
How Long Can You Drive After a Tire Repair?
| Repair Type | Speed Limit | Distance |
|---|---|---|
| Tire plug | Normal driving | Up to 20,000 miles (temporary) |
| Tire sealant | 50 mph max | 50–100 miles |
Professional advice:
Always replace or internally patch the tire later.
Common Tire Repair Mistakes
| Mistake | Why It’s Dangerous |
|---|---|
| Plugging sidewall damage | Blowout risk |
| Driving fast after sealant | Loss of control |
| Skipping air pressure check | Uneven wear |
| Ignoring warning vibrations | Hidden damage |
Safety Tips from a Mechanic
-
Never repair tires on highways if unsafe
-
Wear gloves and eye protection
-
Avoid driving on repaired tires long-term
-
Retorque lug nuts after 50 miles
FAQ Section
Can I repair a tire without removing it?
Yes, for plug repairs.
Sealants also work without wheel removal.
Is a plugged tire permanent?
No.
It’s an emergency repair, not a permanent fix.
Should I replace a plugged tire later?
Yes.
Internal patch-plug repairs are safest.
Can I repair a tire twice?
Only if punctures are far apart and small.
Otherwise, replace it.
Final Thoughts
Flat tires are stressful.
But panic won’t fix them—knowledge will. You have to know how to repair a tire.
With the right tools and proper steps, tire repair becomes a life-saving skill, not a roadside nightmare.
Practice once at home, and you’ll be ready when it matters most.
Drive safe. Stay prepared.